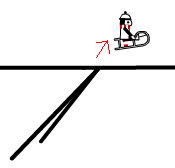
Line Rider Beta 2 User Manual Table of Contents Controls - ◙◙◙ Anatomy - ♠♠♠ Tricks - ☺☺☺ Downloading/Uploading .SOL Files and Tracks - ►►► Recording/Uploading Track Videos - ♪♪♪ Terminology - æææ Glitches - ☼☼☼ Credits - ◊◊◊ ◙◙◙Controls◙◙◙ InterfaceToolbar  1. This is the pencil tool, it lets you free draw lines. It will draw lines along the path your mouse takes. 2. This is the line tool, it lets you draw straight lines from point A to point B. You can hold S while drawing lines to stop line snapping, which is when your next line starts from the last one. 3. This is the eraser tool, it will erase each individual line if you hold the mouse button while moving over the line. 4. This is the zoom tool. You can either use your mouse wheel if you have one, or hold the mouse button and move up or down. You can reset the zoom to normal by pressing shift, and then press the zoom tool. If you want to play the track with the same zoom as editing mode, hold the shift key and press the play button at the same time. 5. This is the hand tool, hold the mouse button and you can move around your track. You can do this while having any other tool selected by holding the space bar. 6. This is the play button, pressing it will start your track. 7. This is the stop button, pressing it will take you from play mode to editing mode. 8. This is the flag button, you can press it while in play mode to save the position, speed, and direction of LR. Now you can press play and start the track from there. You can start the track from the beginning and keep your flag while holding the A key and pressing play. 9. This is the save button, you can save your tracks here. Note that you cannot save tracks with no lines. 10. This is the trash can button; it will let you clear your track and get rid of everything, make sure you save your track if you want to keep it. 11. This is the normal line tool, you can use this with either the Pencil or Line tool (#’s 1 and 2). These are what most of your track will be, if you want to draw these, just hold your mouse, and move from left to right, and let go. If you want to create and upside down line, go from right to left. If you want to change which direction makes which line, you can hold down shift while making the line. 12. This is the boost line button. Boost lines change the speed of LR. You draw these lines just like normal ones. To draw an acceleration line, just draw it like a normal line. If you want to draw de-acceleration lines, then hold shift while drawing the line. 13. This is the scenery line button. Drawing scenery lines is like drawing in Paint or any other drawing program, you just click and hold where you want the lines to be. These lines will not affect LR’s path. Start Point  This is where LR will start his path, it automatically places itself above your first line. You can move it by holding D and then dragging it. Line Count  This lets you know how many lines your track is made of, it’s in the top right of your screen. Start Point Finder  This tells you where the start point is. It tells you, in pixels, the length the Start Point is away from the Finder (the smaller Start Point), and the direction it is in (the arrow). Quick Keys These keys all have actions to them, they are helpful while making your track. Camera Shortcuts Home - Brings the view to the start point. End - Brings you to the last drawn line. F – Brings you to the flag, if you set one. Tab – Zooms out to the whole track. Press again to zoom in on where the cursor is. M – Triggers slow motion while in play mode. Z – Zooms in. X – Zooms out. Shift + R - Brings you to the default zoom level. Tool Select Shortcuts Q - Pencil Tool W - Straight Line Tool E - Eraser R - Zoom Tool T - Move Tool Spacebar - Temporary move tool while other tool is selected. Y - Play U - Stop I - Flag tool O - Save or delete a saved track. P - Delete track. 1 - Selects the blue line. 2 - Selects the red line. 3 - Selects the green line. Other Shift - Lets you draw lines backwards. Backspace/Delete – Deletes the last line you drew. Shift and D, then click Start Point – Resets the start point. H - Brings you to the Help Menu (now why would you need that? =D). ♠♠♠Anatomy♠♠♠ LRThere's nothing much about LR except that his limbs and body move, and his scarf. The scarf just tells you in what direction he's moving, it points the opposite way of his direction. Sled 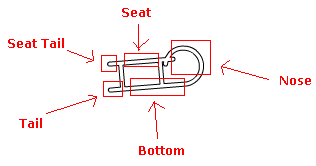 The Sled can also be broken. In some cases, the impact is so high that the sled flips around the wrong way.   Lines Normal Lines: 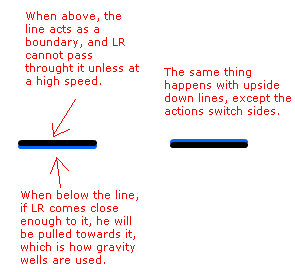 Boost/Acceleration Lines:  Scenery/Background Lines: 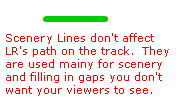 ☺☺☺Tricks☺☺☺ Trick Overview Here's a video that will show you a lot of tricks you can perform with Line Rider!
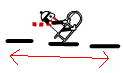
Aerial Tricks Ollie - When LR pops up into the air, this is usually done by anti gravity wells. Not a ramp.
Spoiler!
Back flip - When LR does a full rotation counter clockwise while in air.
Spoiler!
Front flip - When LR does a full rotation clockwise while in the air.
Spoiler!
Fakie Flip - When LR spins in one direction, then randomly changes direction in mid air. LR should do this himself; no objects can come in contact with him. Grinds/Balances: Any trick here can be used in loops, lily padding, and everywhere else, but they will not all be mentioned, as that would be just like restating it. On Sled Nose Manual (nosie) - When LR balances by the nose of his sled at any angle.
Spoiler!
Tail Manual - When LR balances on the bottom line of his sled at any angle.
Spoiler!
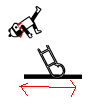
Back Grind - When LR sits on the back two lines of his sled. For it to be considered a backgrind, he must be on both lines.
Spoiler!
Board Slide - When LR rides the line at a crook, half of his board should be below the line.
Spoiler!
Head Manual - When LR rides the line while on his shoulders/head. His head should dip below the line, and the sled should not touch it at all.
Spoiler!
Off Sled Basically any trick that you can do On Sled, can be done Off Sled. The only difference is that the dude isn't on the sled. Off Sled Nose Manual - When the sled does a nose manual. LR cannot be on the sled while this is happening.
Spoiler!
Off Sled Tail Manual - When the sled does a tail manual. LR cannot be on the sled while this is happening.
Spoiler!
Seat Manual - When the sled balances on its Seat Tail, the bar opposite of the tail. LR cannot be on the sled while this is happening.
Spoiler!
Hangs/Stalls On Sled Motionless Nose Manual - When LR is doing a Nose Manual, but not moving. Can be identified if LR's scarf is not moving.
Spoiler!
Nose Hang - When LR is hanging from the bottom of a line, the nose of the sled should be touching the line.
Spoiler!
Tail Hang - When LR is hanging from the bottom of a line, the tail of the sled should be touching the line.
Spoiler!
Hand Stall - When LR hangs from a line from his hand. He should be hooked on by his hand and the sled's string.
Spoiler!
Magnet Stall - When LR hangs from a cross of lines by his nose. He should move back and forth as if bouncing.
Spoiler!
Off Sled Again, basically anything that can be on sled can be off sled, these are just the more popular ones. Off Sled Nose Hang - When the Sled is hanging from the bottom of a line, the nose should be touching the line. LR cannot be on the sled.
Spoiler!
Off Sled Tail Hang - When the Sled is hanging from the bottom of a line, the tail should be touching the line. LR cannot be on the sled.
Spoiler!
Off Sled Nose Hang Loop - When you are doing an Off Sled Nose Hang, the sled will go around a loop 360 degrees.
Spoiler!
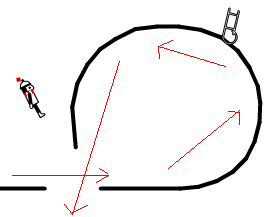
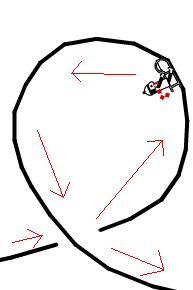
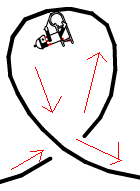
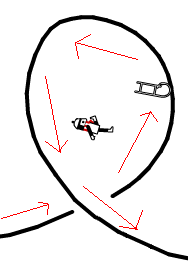
Loops Any grind/balance can be used in a loop, here are some of them. Loop - When LR rides a line in a full circle until he has turned 360 degrees.
Spoiler!
Manual Loops - When LR does a loop while balancing on any part of his sled (see Grinds/Balances section).
Spoiler!
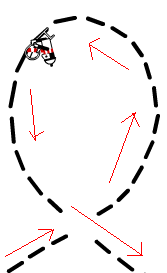
Clover - When LR goes through a series of 4 loops, they should resemble a clover.
Spoiler!
Off Sled Manual Loop - When the sled does a loop while balancing on its nose. LR should not be on the sled.
Spoiler!
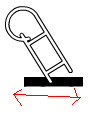
Lily Padding Any grind/balance can be used while Lily padding, here are some of them. Lily Padding - When LR rides along small sections of lines. They should be considerably small.
Spoiler!
Lily Pad Manual - When LR/the Sled balances on any part of his sled while lily padding.
Spoiler!
Lily Pad Loop - When LR/the Sled rides a line in a full circle, while lily padding, until he has turned 360 degrees. You can also incorporate any Grind/Balance.
Spoiler!
Lily Pad Hang - When LR/the Sled is Hanging, and goes past small segments of lines.
Spoiler!
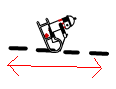
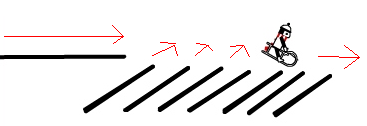
Gravity Wells/Quirks Spring Ramp - When LR rides a ramp made out of stacked lines, similar to Stairs, except curved into a ramp.
Spoiler!
Gravity Well - When LR is attracted to the bottom of a line, and pops above it.
Spoiler!
Anti-Gravity Well - When LR is pushed away from two connected lines. The black sides should be on the inside.
Spoiler!
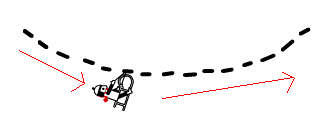
Gravity Well Swing – When LR is attracted to the bottom of group of lines, and swings in an arc over or under them.
Spoiler!
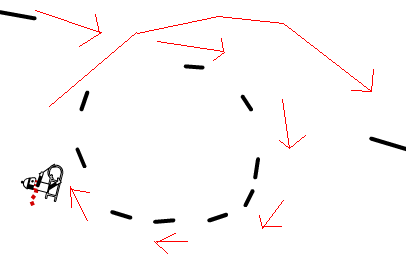
Gravity Well Loop - When LR travels around a cluster of lines without touching them.
Spoiler!
Transporters Invisible Line - When you arrange a set of lines correctly so there is a ridable "invisible" spot between them. This is done by doubling the lines on each side, and leaving a space between.
Spoiler!
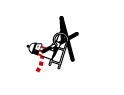
Cannon - When LR goes into a cluster of lines, which are spaced out. He should detach from his sled and shoot away.
Spoiler!
Pinch Cannon - When LR goes between two lines closely placed next to each other, and speeds up.
Spoiler!
Ladder - When LR is forced between two vertical lines, other small horizontal lines should push him upward. It should resemble a ladder. (To stop it from functioning as a cannon, you should make the two vertical lines tight together so LR doesn't shoot up.)
Spoiler!
►►►Downloading/Uploading .SOL Files and Tracks►►► Finding Your .SOLBefore you do anything with .SOL files, you should first find the folder which contains yours. To get there, do one of the following, depending on you operating system: Windows XP 1. Copy and Paste this into your navigation bar on Internet Explorer, replacing the ***** with your username: C:\Documents and Settings\*****\Application Data\Macromedia\Flash Player\#SharedObjects Then click the folder that should now be sitting in the window, it should be named with random letters and numbers. 2. Go to the Start Menu and click the following: My Computer > C: > Documents and Settings > ***** > Application Data > Macromedia > Flash Player > #SharedObjects > (Random Numbers and letters, should be only folder in here but possibly more) > Windows Vista and Windows 7 1. Copy and Paste this into your navigation bar on Internet/Windows Explorer, replacing the ***** with your username: C:\Users\*****\AppData\Roaming\Macromedia\Flash Player\#SharedObjects\ Then click the folder that should now be sitting in the window, it should be named with random letters and numbers. 2. Go to the Start Menu and click the following: Computer > OS (C:) > Users > ***** > AppData > Roaming > Macromedia > Flash Player > #SharedObjects > (Random Numbers and letters, should be only folder in here but possibly more) > Mac OS X 1. Go to your Macintosh HD folder (hardrive) and search "sharedobjects" (You can also use spotlight, or Apple + F). Now open this folder, and there should be another one named with random letters and numbers. Open up this folder.) 2. Paste the following in your navigation bar, replacing the ***** with your Username: /Users/*****/Library/Preferences/Macromedia/Flash Player/#SharedObjects/(Random Numbers and letters, should be only folder in here but possibly more) > 3. Go to your Apple Hard disk, and follow these clicks: ***** > Library > Preferences > Macromedia > Flash Player > #SharedObjects > (Random Numbers and letters, should be only folder in here but possibly more) > Linux Copy and Paste this into your navigation bar, replacing the ***** with your username: /home/******/.wine/drive_c/windows/profiles/******/ApplicationData/Macromedia/Flash Player/#SharedObjects/ Then click the folder that should now be sitting in the window, it should be named with random letters and numbers. From here, you click: < home < ****** < programs < LineRider_beta.exe After you have found the folder with your .SOL file (which should be named savedLines.SOL), right click it, and select "Create Shortcut". Then drag this shortcut to your desktop, so you can easily get in and out of the folder.
You may also want to keep a copy of your own .SOL file in a different folder, in case it gets mixed up with other peoples. Managing Your .SOL Files Here are some tips to keep your files in line: -Keep Backups of all your files in a different folder, on the desktop. -Upload all of your files to an uploading siteCONTENT -->. -Add folders, so you can organize them by what kind of tracks they are, or who made them. -Don’t delete any files, put them in a folder and name it “Don’t Need”, or “Done With”. Just in case you actually need them again.
Downloading .SOL files To download a .SOL file, you first need to change the name of your original one; make it anything but "savedLines.SOL". Now you can download the .SOL to your desktop, it should only take a few seconds for it to load. Now open up your folder with your .SOL files, and drag the new "savedLines" into it, and make sure you've renamed your original one. You can keep multiple .sol files in your folder, but only one of them can be named savedLines.SOL, otherwise all will be replaced with the most recently added one of that name. Uploading Your .SOL Files To upload your .SOL, you can either attach it into a post, which is the easiest way, or you can use a different website. Some of the most popular ones are: Box.net Rapidshare.com Mediafire.com Megaupload.com After you've gone to the location of your files and uploaded them, you should find the public link from the website you used so people can download it, then just paste into a post of yours in the .SOL exchange. Recording Your Tracks To record your track, you will need a screen recorder. Some of the most trustful ones are listed here, and where you can download them. CamStudio - www.Camstudio.org Hypercam - www.Hyperionics.com/hc Camtasia - www.Camtasiastudio.com If you cannot figure out how to get these working, you can either look for tutorials on the web, or HERE for perfect recording using CamStudio, which is what I use. Uploading Your Track Videos Now that you have recorded your track, make sure it is saved as a .WMV, .AVI, .MOV, or .MPG, because you are going to upload it to Youtube.com or Google.com. Since no one will want to download your video, you'll have to make it so they can easily view it in your post. Create an account on either site if you don’t have one. Youtube: Now log into your account, and select "Upload Video". Type in a title, description, and tags for your video, then go to the next page. Now select "Browse", then find your video, and finish uploading the video. It can take from 10-120 minutes to process, depending on the size; so be patient. Now, take the last bit of the internet address of your movie, should be random numbers and letters, and write [yt](numbers and letters)[/yt] on your post.
Google: First, log into your account, and select "Upload your Videos". Select "Browse", and find your video, then go on and type in the Title Description, and other details of your movie. Once you're done, you can select "Upload Video". It should take a while for them to look over it, but once your done you can copy and paste the last part of the internet address (should be random numbers), and paste it into the forums as <gvideo>(numbers)</gvideo>, but remember to change the <> to [].
æææTerminologyæææ These are some terms people use in Linerider:LR - Line Rider (the game); The person riding the sled. Nosie - Nose Manual. Quirky - A style of track that uses mainly gravity wells and doesn't have very long lines. Live Play - When you draw in the lines as your track is playing. See glitches section for info on how to do this. *fsk - The deviantART user name for the creator of Line Rider, Bostjan Cadez. ☼☼☼Glitches/Secrets☼☼☼ Draw while in Play Mode (Live Play)This is a very cool glitch. To do this, you first need to make a line, so you can press the play button. Now before you press the play button, push down your Control Key (Ctrl). Now press play. LR should hit the line, and fall down. Now you can begin moving about drawing lines with him. You will use the tool you have last selected, the pencil tool is best for this. Invisible Lines The procedure to do this is very much like Drawing in Play Mode. You do the same thing except have the zoom tool selected before you press play. When scroll far away, or very close, LR will ride on nothing. You may be able to see your track in the background. Erasing in Play Mode Just like Invisible Lines and Drawing in Play Mode, select the Eraser tool, press Ctrl, and press play. You can erase lines as LR is going along the track. Grey Lines While you are using the line tool, click and move so you have a grey line (don't let go). Now press the E key, and move away. The grey line should stay there, but if you press play or select the line tool again, it will disappear. Broken Sled For this glitch, you need a track in which the LR detaches from his sled, and then later on the sled brakes. Play your track. Once LR is off the (undamaged) sled, press the flag button. Now continue on to where the sled breaks. After it breaks, press stop. Now you can replay the track from the flag, where the sled was unbroken. The sled will now be broken from where you started at the flag. And you won't ruin your track, because broken sleds don't do anything different than unbroken ones. Look Away/Freeze Glitch This is just a random glitch, you can't really force it. Sometimes when LR is going through many different lines (mostly on quirky tracks), the game can get confused on where he's going, and the camera will dart away from him to somewhere else in the game. He also freezes while this is happening. Ghost Flag This one is pretty interesting. While you are in play mode, you can set a different type of flag. To do this, hold the C key while you are pressing the flag, and a "Ghost" of LR should remain where the flag should be. It functions as a normal flag, except that you can't view its location by pressing the F key. Play while in Edit Mode This glitch allows you to play your track while in edit mode, so the lines will still have their colors to it. This is useful for showing people in videos how their track works. To do this, first open up the "Load Track" menu and choose a track. Now at the same exact moment you press "Load", also press the Y key. Only the first 1-5 lines should be black (depending on how soon you pressed Y), but the rest should all be red, blue, and green; while you're playing! Draw Extremely Small Lines To do this glitch, you should first know how to do the "Live Play" secret. Use this secret, and set up a track that will keep LR still. Go into Live Play, and wait till he stops. Now you must zoom in all the way (Z Key), and you can start drawing lines. These lines can be so small that they look more like dots from normal view. ◊◊◊Credits◊◊◊ The original tutorial, which once was available at linerider.org and is now defunct, was recreated, updated and modified by Tom Cammarata (aka Scruffy; aka Nunzio; aka Phzzz). | |||||||||||||||